|
Sceneview
|
|
Sceneview
|
This tutorial introduces the following:
There are three files in this tutorial
my_renderer.hpp
my_renderer.cpp
tutorial_03_renderer.cpp
If you build and run this example, you'll hopefully see something like:
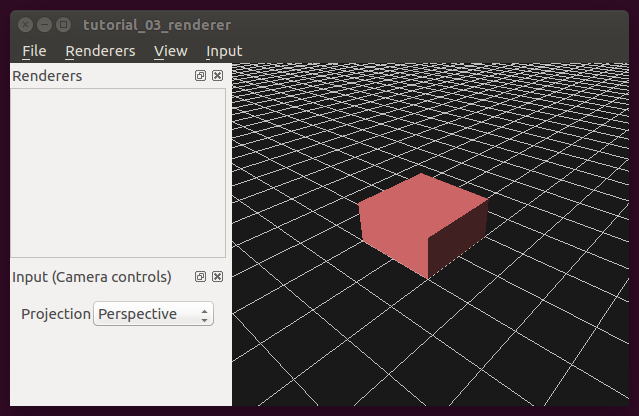
Try interacting with the 3D rendering widget by cilcking and dragging with the mouse. You should be able to move the camera around, panning, zooming, rotating.
There are two ways to draw things in Sceneview:
The Design Overview document has more information, but the basic idea is that if you're an OpenGL expert, then you can use Sceneview as a toolkit that provides some handy GUI elements and design patterns, and then go to town writing your own shaders and calling OpenGL directly. If you want to operate at a higher level of abstraction than what OpenGL provides, then Sceneview provides a way to do that using its scene graph and resource system.
There are many good online tutorials describing a scene graph, so we won't cover it here. The important thing to know about Sceneview is that there are exactly 4 node types allowed in a Sceneview scene graph:
Creating a custom renderer involves subclassing from sv::Renderer. sv::Renderer is itself a QObject, so you'll want to adhere to standard Qt practices that apply when subclassing QObject (e.g., use the Q_OBJECT macro).
Every renderer has a name, set during construction. This name is used by other Sceneview widgets to identify the renderer in GUI elements.
When a sv::Renderer is first constructed, the OpenGL context may not have been initialized yet. To account for this, each renderer should override sv::Renderer::InitializeGL, which is called by Sceneview at the time the OpenGL context actually does get initialized.
In addition to sv::Renderer::InitializeGL, the following additional methods can be overridden:
The sv::Renderer class API provides additional documentation and information on what other resources are available.
The meat of our custom renderer happens in its implementation of InitializeGL. Starting off we have:
To start off with, it calls sv::Renderer::GetScene() to get a pointer to the scene graph. This is reasonable, as we want to add drawable things to the scene graph. Where does the scene graph come from?
Similar to the scene graph, every sv::Viewport also has a resource manager, which gets passed to the sv::Renderer.
Next, we have:
When a renderer is added to a viewport, the viewport automatically creates a sv::GroupNode in the scene graph and assigns it to the renderer. This node can then be used by the renderer to attach nodes to the scene graph that are owned and managed by the renderer. In addition to providing a default way of grouping and organizing nodes in the scene graph, this also enables Sceneview to enable or disable entire renderers by disabling the renderer's base group node.
If you want, you could bypass the renderer's base node and attach nodes directly to the scene graph, but then you'll lose the ability to let Sceneview manage some rendering aspects for you.
Every item that can be drawn in the scene graph needs two parts: geometry and appearance. The geometry generally specifies the shape and location of what's being drawn. The appearance roughly dictates how the item will look (i.e., its color).
Our custom renderer inserts a simple red cube in the scene graph. To do this, it first creates the cube's geometry:
Sceneview provides some stock geometry resources that you can use for simple rendering and also just to get started. You can define your own custom geometries and load your own meshes, but sometimes a simple cube is good enough.
Note that there is exactly one stock cube resource. If you create 10,000 cubes, the geometry will still only be stored once and what you'll have are 10,000 shared pointers to the same stock cube.
After creating the cube geometry, our custom renderer specifies its appearance. This is done using a sv::MaterialResource :
Finally, the geometry and material are combined and attached to the scene graph in a new draw node.
Now that we've defined a custom renderer, we can add it to the viewport. The following lines of code are the relevant bits in tutorial_03_renderer.cpp:
 1.8.6
1.8.6

